This manual provides detailed repair procedures‚ parts diagrams‚ and troubleshooting guides for GE washers․ It helps users diagnose and fix common issues safely and effectively at home․

Finding Your Model Number
To effectively use the GE washer repair manual‚ locating your washer’s model number is essential․ This number is typically found on a label located on the side of the washer or inside the washer door․ It may also be printed on the back or bottom of the unit․ The model number is crucial for downloading the correct repair manual‚ as it ensures the instructions and diagrams match your specific washer model․ Once you have the model number‚ visit the official GE Appliances website and enter it in the provided search field to access the corresponding manual․ This step guarantees you have accurate information for troubleshooting and repairs․
Understanding the Repair Manual
The GE washer repair manual provides detailed repair procedures‚ parts diagrams‚ and troubleshooting guides․ It helps users identify and fix issues efficiently‚ ensuring safe and effective repairs․
The GE washer repair manual is a comprehensive guide designed to help users understand and maintain their washing machine․ It includes detailed repair procedures‚ parts diagrams‚ and troubleshooting guides to address common issues․ The manual is structured to be user-friendly‚ with clear instructions for both novice and experienced users․ It covers essential topics such as safety precautions‚ diagnostic modes‚ and step-by-step repair processes․ Additionally‚ the manual provides access to error codes and fault charts‚ enabling users to identify and resolve problems efficiently․ By following the manual‚ users can perform repairs safely and effectively‚ extending the lifespan of their appliance․ It also emphasizes the importance of regular maintenance to prevent future issues․ This resource is invaluable for anyone looking to repair or maintain their GE washer․
3․2 Parts List and Diagrams
The GE washer repair manual includes a detailed parts list and diagrams to help users identify and locate components․ These diagrams provide a visual representation of the washer’s internal structure‚ making it easier to understand how parts interact․ The parts list is categorized‚ allowing users to quickly find specific components such as the motor‚ gearbox‚ water pump‚ and control panel․ Each part is labeled with its model number‚ simplifying the process of ordering replacements․ The diagrams also highlight common wear-and-tear areas‚ helping users anticipate potential issues․ By referencing these resources‚ users can ensure they have the correct tools and parts before starting a repair‚ saving time and reducing the risk of errors․ This section is essential for anyone attempting DIY repairs on their GE washer․
3․3 Troubleshooting Guide
The troubleshooting guide in the GE washer repair manual helps users identify and resolve common issues efficiently․ It provides a systematic approach to diagnosing problems‚ starting with error codes and symptom-based troubleshooting․ Users can refer to detailed fault charts for binary displays‚ which map specific issues to their corresponding codes․ The guide also addresses frequent concerns like the washer not agitating‚ spinning‚ or draining‚ offering step-by-step solutions․ By following the guide‚ users can pinpoint faulty components‚ such as the motor‚ gearbox‚ or water pump‚ and determine whether a repair or replacement is needed․ This section empowers users to address problems confidently‚ reducing the need for professional assistance and saving time and money․ It ensures that repairs are done safely and effectively‚ extending the lifespan of the washer․
3․4 Step-by-Step Repair Procedures
The GE washer repair manual provides comprehensive‚ step-by-step repair procedures for various components‚ ensuring clarity and ease of understanding․ Each procedure is detailed with specific instructions‚ making it accessible for both novice and experienced users․ The guide covers everything from disassembling the washer to replacing critical parts like the motor‚ gearbox‚ or water pump․ Clear diagrams and illustrations accompany the text‚ helping users visualize each step․ The procedures emphasize safety‚ outlining precautions to avoid damage or injury․ Whether addressing a faulty control panel or a malfunctioning drain pump‚ the manual offers practical‚ actionable solutions․ By following these steps‚ users can confidently restore their washer to optimal performance‚ saving time and money on professional repairs․ This section is indispensable for anyone aiming to fix their GE washer efficiently and effectively․
3․5 Diagrams and Illustrations
The GE washer repair manual includes detailed diagrams and illustrations to assist users in understanding the internal structure and components of their appliance․ These visuals are essential for identifying parts‚ locating connectors‚ and following repair steps accurately․ The diagrams are often color-coded and labeled‚ making it easier to recognize specific elements like the motor‚ gearbox‚ or control panel․ Illustrations also accompany step-by-step procedures‚ providing a clear visual guide for tasks such as disassembling the washer or replacing the water pump․ Exploded views of components help users understand how parts interact and fit together․ These diagrams are particularly useful for novice repairers‚ as they simplify complex processes and reduce the risk of errors․ By referencing these visuals‚ users can ensure accurate and efficient repairs‚ making the manual an invaluable resource for DIY maintenance and fixes․
Common Issues and Solutions
Address common GE washer issues like agitation failure‚ spinning problems‚ leaks‚ drainage issues‚ and unusual noises․ Refer to the troubleshooting guide for step-by-step solutions and repairs․
4․1 Washer Not Agitating
If your GE washer is not agitating‚ it could be due to a faulty lid switch‚ broken belt‚ or issues with the motor or control panel․ First‚ ensure the washer is properly loaded and the lid is closed securely․ Check the power supply and circuit breaker to rule out electrical issues․ Refer to the troubleshooting guide in the repair manual for specific fault codes or symptoms․ Inspect the belt for signs of wear or damage and replace it if necessary․ If the problem persists‚ the motor or gearbox may need professional attention․ Always disconnect power before attempting repairs․ Consult the manual for detailed diagnostic steps and replacement procedures to restore proper agitation function․
4․2 Washer Not Spinning
If your GE washer is not spinning‚ it may indicate issues with the motor‚ drain pump‚ or control panel․ Check if the drain pump filter is clogged with debris‚ as this can prevent proper spinning․ Ensure the washer is properly balanced and the load is evenly distributed․ Refer to the troubleshooting guide in the repair manual for specific error codes related to spinning issues․ If the problem persists‚ inspect the belt or direct drive motor for damage․ Consult the manual for step-by-step instructions on diagnosing and replacing faulty components․ Always disconnect power before attempting repairs․ Addressing the issue promptly can prevent further damage and restore proper spinning function to your washer․
4․3 Leaking Water Issues
Leaking water from your GE washer can be caused by worn-out seals‚ loose connections‚ or damaged hoses․ Inspect the door gasket and tub seal for signs of wear or mold․ Check the water inlet hoses for cracks or corrosion and ensure they are securely connected․ If the leak persists‚ the drain pump filter may be clogged‚ preventing proper water drainage․ Refer to the repair manual for guidance on replacing faulty components․ Regularly inspecting and maintaining these parts can prevent future leaks․ Always turn off the water supply and unplug the washer before attempting repairs․ Addressing leaks promptly can prevent water damage and ensure optimal washer performance․ Consult the troubleshooting guide for detailed steps to identify and resolve the issue effectively․
4․4 Washer Not Draining
If your GE washer is not draining‚ the issue may be due to a clogged drain pump filter‚ kinked drain hose‚ or blockage in the drain system․ Start by checking the drain pump filter‚ located at the bottom of the washer‚ and clean it thoroughly․ Ensure the drain hose is straight and not kinked‚ as this can prevent proper water flow․ If the problem persists‚ inspect the drain system for debris or obstructions․ Regularly cleaning the filter and ensuring the drain hose is properly installed can help prevent this issue․ Refer to the repair manual for step-by-step instructions on accessing and cleaning the drain pump․ Addressing this problem promptly will restore proper drainage and ensure your washer operates efficiently․ Always unplug the washer before performing any maintenance or repairs․
4․5 Unusual Noises
Unusual noises from your GE washer‚ such as clunking‚ grinding‚ or rattling sounds‚ can indicate issues with internal components․ These noises often occur due to loose parts‚ faulty bearings‚ or debris inside the drum․ To address this‚ first‚ check for any foreign objects like coins or zippers that may be causing the noise․ If the issue persists‚ inspect the washer’s bearings or balance pads‚ as wear and tear can lead to loud operation․ In some cases‚ the noise may be due to an unbalanced load or misaligned drum․ Refer to the repair manual for guidance on diagnosing and replacing faulty parts․ Regular maintenance‚ such as tightening loose components and cleaning the interior‚ can help prevent unusual noises and ensure smooth operation․ Always unplug the washer before performing any internal inspections or repairs․

Diagnostic Mode and Error Codes
GE washers feature a diagnostic mode that helps identify issues through specific error codes․ To access this mode‚ press and hold the “Signal” and “Delay Start” buttons for 5-10 seconds․ The display will show error codes like “dL” for door lock issues or “Sd” for drainage problems․ These codes‚ often represented by letters or numbers‚ correspond to specific faults detailed in the repair manual․ For example‚ “LC” indicates a load detection error․ Newer models may use a binary display‚ where flashing lights or numeric codes point to the problem․ Refer to the manual to interpret these codes accurately․ Once identified‚ follow the recommended troubleshooting steps or repair procedures to resolve the issue․ This feature saves time and helps users address problems efficiently‚ whether through DIY fixes or professional assistance․
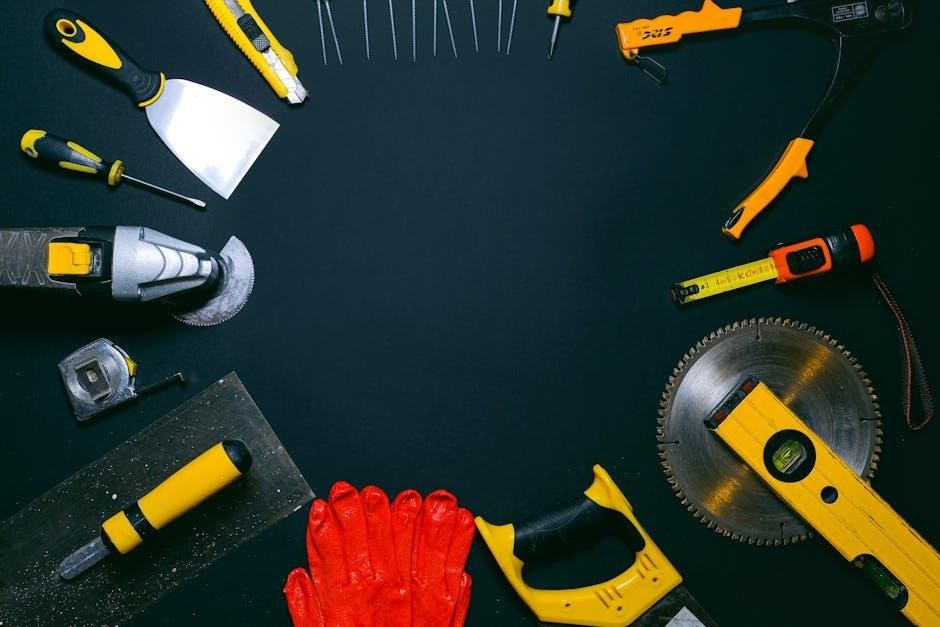
Tools and Safety Precautions
Before starting any repair‚ ensure you have the right tools and follow safety guidelines․ Essential tools include a screwdriver set‚ pliers‚ a wrench‚ and a multimeter for electrical diagnostics․ Always disconnect the power supply and water hoses before disassembling the washer․ Wear protective gloves and safety glasses to prevent injuries․ Drain the washer thoroughly to avoid water spills․ Refer to the manual for specific instructions‚ as some models may require additional precautions․ Never bypass safety features or ignore warnings‚ as this could lead to further damage or personal harm․ Proper preparation and adherence to safety protocols ensure a smooth and secure repair process․ Always use genuine GE parts to maintain appliance performance and safety standards․
Disassembling the Washer
Disassembling your GE washer requires careful planning and adherence to safety guidelines․ Start by disconnecting the power‚ water supply‚ and drain hoses․ Remove the top panel by taking out the screws at the back․ Next‚ disconnect the control panel and set it aside․ Drain the tub thoroughly to prevent water spillage․ Use a wrench to remove the tub’s mounting bolts and carefully lift it out․ For front-load models‚ remove the lower panel and disconnect the pump before accessing the internal components․ Refer to your specific model’s manual for detailed disassembly steps‚ as procedures may vary․ Take photos or notes to help reassemble correctly․ Always mark screws and parts to ensure proper reinstallation․ Disassembly is a critical step for accessing internal parts like the motor‚ gearbox‚ or pump for repair or replacement․

Replacing the Motor
Replacing the motor in your GE washer is a complex task that requires careful disassembly of the appliance․ Start by disconnecting the power and water supply for safety․ Remove the top and back panels to access the motor‚ located near the bottom of the tub․ Disconnect the electrical connectors and mounting bolts securing the motor․ Gently lift the motor out of its housing․ Install the new motor by reversing the steps‚ ensuring all connections are secure․ Refer to your specific model’s manual for precise instructions‚ as motor locations and configurations may vary․ Proper alignment and tightening of bolts are crucial for optimal performance․ After reassembly‚ test the washer to ensure the motor operates smoothly and quietly․ Always use genuine GE replacement parts to maintain warranty validity and appliance efficiency․
Replacing the Gearbox
Replacing the gearbox in your GE washer involves several steps to ensure proper functionality․ Begin by disconnecting the power and water supply for safety․ Remove the top and back panels to access the gearbox‚ typically located beneath the tub․ Disconnect the electrical connectors and drain hoses connected to the gearbox․ Use a wrench to remove the mounting bolts and gently lift the gearbox out of its housing․ Inspect and clean the area before installing the new gearbox․ Secure it with the bolts and reconnect all hoses and electrical connections․ Tighten all connections firmly to prevent leaks or mechanical issues․ Refer to your model’s manual for specific instructions‚ as gearbox designs may vary․ After reassembly‚ run a test cycle to ensure smooth operation and check for any leaks or unusual noises․ Always use genuine GE parts to maintain performance and warranty validity․
Replacing the Water Pump
Replacing the water pump in your GE washer is a manageable repair that can resolve leaking or drainage issues․ Start by disconnecting the power and water supply to ensure safety․ Locate the water pump‚ typically found at the bottom of the washer near the drain pump․ Use a wrench to disconnect the inlet and outlet hoses‚ taking care to place a drip pan underneath to catch any residual water․ Next‚ disconnect the electrical connector from the pump․ Remove the mounting screws or clips securing the pump and gently pull it away from the washer․ Install the new pump by reversing these steps‚ ensuring all connections are tight to prevent leaks․ Refer to your model’s manual for specific instructions‚ as pump locations and configurations may vary․ After installation‚ run a test cycle to verify proper drainage and check for any leaks․

Replacing the Control Panel
Replacing the control panel on your GE washer is a straightforward process that can resolve issues with the user interface or display․ Start by disconnecting the power supply to the washer for safety․ Access the control panel by removing the top or front panel‚ depending on your model․ Once accessible‚ disconnect the electrical connectors from the old control panel․ Remove the mounting screws or clips securing the panel and carefully lift it away․ Install the new control panel by reversing these steps‚ ensuring all connectors are securely attached․ Reassemble the washer and restore power․ Test the control panel by running a diagnostic cycle to ensure all functions operate correctly․ Refer to your specific model’s manual for detailed instructions‚ as panel configurations may vary․ Proper installation ensures optimal performance and prevents further issues․
Replacing the Drain Pump
Replacing the drain pump on your GE washer is essential if it fails to drain water properly․ Start by disconnecting the power and water supply for safety․ Locate the drain pump‚ usually found at the bottom of the washer․ Drain the remaining water by placing a shallow pan under the drain hose and disconnecting it․ Remove the screws or clips holding the pump in place․ Disconnect the electrical connectors and hoses from the old pump․ Install the new pump by reversing these steps‚ ensuring all connections are secure․ Reassemble the washer and restore power․ Test the pump by running a drain cycle to confirm proper function․ Regular maintenance‚ like cleaning the pump filter‚ can prevent future issues․ Always refer to your specific model’s manual for precise instructions‚ as pump locations and configurations may vary․ Proper installation ensures efficient drainage and prevents water accumulation․

Replacing the Bearings
Replacing the bearings in your GE washer is a critical repair when you notice unusual noises‚ vibration‚ or leakage․ Start by disconnecting the power and water supply for safety․ Drain the washer and disassemble it to access the tub․ Remove the tub and inspect the bearings for wear or damage․ Use a press or specialized tools to remove the old bearings and install the new ones․ Ensure proper alignment and lubrication during installation․ Reassemble the washer‚ making sure all parts are securely tightened․ Test the washer by running a spin cycle to check for noise reduction and smooth operation․ Regular maintenance‚ such as lubricating the bearings‚ can prevent premature wear․ Always refer to your specific model’s manual for detailed instructions‚ as bearing locations and tools required may vary․ Proper installation ensures quiet and efficient operation․ Bearings are essential for smooth tub rotation‚ so replacing them promptly is crucial․ Always use genuine GE replacement parts for optimal performance․ If unsure‚ consult a professional technician to avoid further damage․ Proper lubrication and alignment are key to extending the life of the new bearings․ Regular checks can help identify wear early‚ preventing costly repairs․ Replacing bearings is a complex process but can save you from buying a new washer․ Follow safety precautions to avoid injury during disassembly and reassembly․ Ensure all connections are secure to prevent leakage or mechanical failure․ Bearings are a vital component‚ and their proper condition ensures the washer’s longevity and performance․ Always prioritize safety and precision when performing this repair․ If you’re not confident in your skills‚ seek professional assistance to avoid complications․ Properly installed bearings will restore your washer’s functionality and reduce noise significantly․ Regular maintenance and inspections can help prevent future bearing issues․ Replacing bearings is a cost-effective solution compared to purchasing a new appliance․ Always follow the manufacturer’s guidelines for the best results․ This repair requires patience and attention to detail to ensure success․ By replacing the bearings‚ you can extend the life of your GE washer and maintain its efficiency․ Proper tools and techniques are essential for a successful repair․ If you notice any signs of wear‚ address them promptly to prevent further damage․ Replacing bearings is a common repair but requires careful execution․ Always prioritize your safety and the integrity of the appliance during the process․ With the right tools and knowledge‚ you can successfully replace the bearings and restore your washer’s performance․ Proper installation ensures the bearings function correctly‚ reducing noise and vibration․ Regular maintenance and timely repairs are key to extending the life of your GE washer․ Replacing bearings is a significant repair but can be done effectively with the right guidance․ Always refer to your manual for specific instructions tailored to your model․ Properly installed bearings will ensure smooth operation and prevent future issues․ If you’re unsure about any step‚ consider consulting a professional to avoid complications․ Replacing bearings is a worthwhile investment in maintaining your washer’s efficiency and longevity․ Always use high-quality replacement parts to ensure optimal performance․ Proper installation and alignment are crucial for the bearings to function correctly․ Regular checks and maintenance can help prevent unexpected repairs․ Replacing bearings is a complex but manageable task with the right tools and knowledge․ Always follow safety guidelines to protect yourself and the appliance․ Properly installed bearings will restore your washer’s functionality and reduce operational noise․ If you’re not confident in your abilities‚ seek professional assistance to ensure the repair is done correctly․ Replacing bearings is a cost-effective way to extend the life of your GE washer․ Always refer to your manual for specific instructions and recommendations․ Proper installation ensures the bearings function smoothly‚ reducing wear on other components․ Regular maintenance and timely repairs are essential for optimal performance․ Replacing bearings requires precision and care but can be done successfully with the right approach․ Always prioritize safety and follow the manufacturer’s guidelines for the best results․ Properly installed bearings will ensure your washer operates efficiently and quietly․ If you encounter any issues during the repair‚ consult a professional to avoid further complications․ Replacing bearings is a significant step in maintaining your washer’s functionality and longevity․ Always use genuine GE parts and follow the manual’s instructions for a successful repair․ Proper installation and alignment are key to ensuring the bearings perform as intended․ Regular checks and maintenance can help identify and address issues early․ Replacing bearings is a challenging but achievable task with the right tools and knowledge; Always follow safety precautions to protect yourself and the appliance․ Properly installed bearings will restore your washer’s performance and reduce noise․ If you’re unsure about any aspect of the repair‚ consider seeking professional help․ Replacing bearings is a worthwhile investment in maintaining your GE washer’s efficiency and longevity․ Always refer to your manual for specific guidance and recommendations․ Proper installation ensures the bearings function correctly‚ reducing vibration and noise․ Regular maintenance and timely repairs are essential for optimal performance․ Replacing bearings is a complex process but can be done effectively with the right approach․ Always prioritize safety and follow the manufacturer’s instructions for the best results․ Properly installed bearings will ensure your washer operates smoothly and efficiently․ If you encounter any difficulties‚ consult a professional to avoid further damage․ Replacing bearings is a crucial step in maintaining your washer’s functionality and extending its lifespan․ Always use high-quality replacement parts and follow the manual’s guidelines for a successful repair․ Proper installation and alignment are essential for the bearings to function correctly․ Regular checks and maintenance can help prevent future issues․ Replacing bearings is a challenging but manageable task with the right tools and knowledge․ Always follow safety guidelines to protect yourself and the appliance․ Properly installed bearings will restore your washer’s performance and reduce operational noise․ If you’re not confident in your abilities‚ seek professional assistance to ensure the repair is done correctly․ Replacing bearings is a cost-effective way to extend the life of your GE washer․ Always refer to your manual for specific instructions and recommendations․ Proper installation ensures the bearings function smoothly‚ reducing wear on other components․ Regular maintenance and timely repairs are essential for optimal performance․ Replacing bearings requires precision and care but can be done successfully with the right approach․ Always prioritize safety and follow the manufacturer’s guidelines for the best results․ Properly installed bearings will ensure your washer operates efficiently and quietly․ If you encounter any issues during the repair‚ consult a professional to avoid further complications․ Replacing bearings is a significant step in maintaining your washer’s functionality and longevity․ Always use genuine GE parts and follow the manual’s instructions for a successful repair․ Proper installation and alignment are key to ensuring the bearings perform as intended․ Regular checks and maintenance can help identify and address issues early․ Replacing bearings is a challenging but achievable task with the right tools and knowledge․ Always follow safety precautions to protect yourself and the appliance․ Properly installed bearings will restore your washer’s performance and reduce noise․ If you’re unsure about any aspect of the repair‚ consider seeking professional help․ Replacing bearings is a worthwhile investment in maintaining your GE washer’s efficiency and longevity․ Always refer to your manual for specific guidance and recommendations․ Proper installation ensures the bearings function correctly‚ reducing vibration and noise․ Regular maintenance and timely repairs are essential for optimal performance․ Replacing bearings is a complex process but can be done effectively with the right approach․ Always prioritize safety and follow the manufacturer’s instructions for the best results․ Properly installed bearings will ensure your washer operates smoothly and efficiently․ If you encounter any difficulties‚ consult a professional to avoid further damage․ Replacing bearings is a crucial step in maintaining your washer’s functionality and extending its lifespan․ Always use high-quality replacement parts and follow the manual’s guidelines for a successful repair․ Proper installation and alignment are essential for the bearings to function correctly․ Regular checks and maintenance can help prevent future issues․ Replacing bearings is a challenging but manageable task with the right tools and knowledge․ Always follow safety guidelines to protect yourself and the appliance․ Properly installed bearings will restore your washer’s performance and reduce operational noise․ If you’re not confident in your abilities‚ seek professional assistance to ensure the repair is done correctly․ Replacing bearings is a cost-effective way to extend the life of your GE washer․ Always refer to your manual for specific instructions and recommendations․ Proper installation ensures the bearings function smoothly‚ reducing wear on other components․ Regular maintenance and timely repairs are essential for optimal performance․ Replacing bearings requires precision and care but can be done successfully with the right approach․ Always prioritize safety and follow the manufacturer’s
This GE washer repair manual serves as a comprehensive guide to diagnosing and fixing common issues‚ ensuring your appliance runs efficiently․ By following the detailed procedures‚ troubleshooting tips‚ and maintenance advice‚ you can extend the life of your washer and save on repair costs․ Always prioritize safety‚ use genuine GE parts‚ and refer to your specific model’s manual for accurate instructions․ Regular maintenance and timely repairs are key to optimal performance․ Whether you’re addressing minor issues or complex problems‚ this manual provides the tools and knowledge needed to keep your GE washer in top condition․ Remember to consult official resources or professionals if unsure‚ as proper repairs ensure safety and longevity․ With this guide‚ you can confidently maintain and repair your GE washer‚ ensuring years of reliable service․